Introduction
Manufacturing is measured in microns, where even the smallest deviation can mean success or failure. In this world, cmm programming has become a vital skill that bridges the gap between engineering designs and quality control. This guide covers everything you need to know about coordinate measuring machine programming from the basics to advanced career paths.
Summary
- CMM programming is writing code that tells the cmm to measure parts along X, Y and Z axes
- PC-DMIS is the most used cmm programming software for modern manufacturing quality control
- Bridge/gantry, arm and handheld CMMs require different programming and skill levels
- Proper calibration and programming is measured in microns for critical manufacturing processes
- Modern cmm programming includes automated routines, cad integration and statistical analysis
What is CMM Programming?
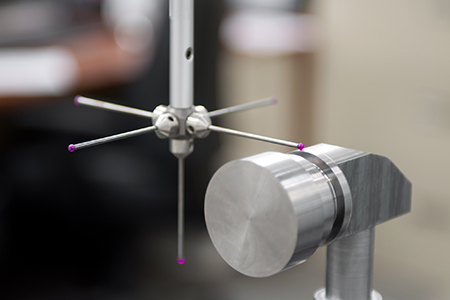
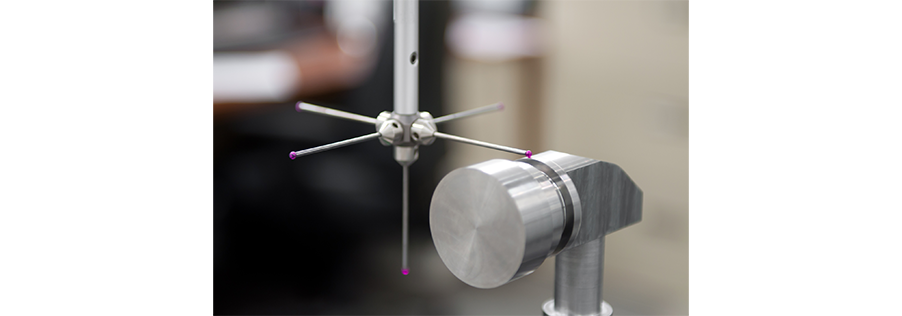
CMM programming creates automated inspection routines that guide coordinate measuring machines (CMMs) through precise measurement sequences. CMM probes are the main tools used to collect measurement data by physically touching the part's surface. At its core, this programming involves writing code that controls probe movement, data collection points and measurement parameters to get accurate measurements of manufactured parts.
The probe determines coordinates in 3D space to capture data points on the part's surface. CMMs measure 2D and 3D dimensions of manufactured parts to ensure all critical features meet design specifications.
The programming process converts engineering blueprints and CAD drawings into executable inspection programs. The CMM programmer interprets these documents to create inspection programs. These CMM programs interpret dimensional specifications, geometric dimensioning and tolerancing (GD&T) requirements and surface finish criteria to determine the best measurement strategy for each part.
CMM programs can be saved and reused for repetitive inspection tasks, making them very useful in high-volume production where the same parts are inspected regularly. These machines are part of the manufacturing process for quality control.
Programming software like PC-DMIS, Metrolog X4 and proprietary systems control machine operations and data analysis. CMM software is used for inspection, reporting and programming tasks on coordinate measuring machines. These platforms are the interface between human programmers and CMM machines, translating measurement intentions into coordinate points and probe movements.
Modern CMM programming goes beyond point-to-point measurements. Today's inspection programs include surface scanning, multi-sensor data fusion and statistical process control to provide quality analysis of manufactured parts.
The main functions of CMM machines are measuring, testing and verifying part accuracy. CMMs can be operated manually or through automated programming, offering flexibility in how measurement routines are performed. CMMs do both measurement and testing to ensure product quality.
For example, a typical CMM programming scenario would be a CMM programmer setting up a program to inspect a machined part for dimensional accuracy, to get all required data points collected and analyzed. The programmer, often called a CMM programmer, is responsible for creating and optimizing these inspection routines to support quality control in the manufacturing process.
Types of CMM Programming Software
The CMM programming software landscape includes many programs for inspection, reporting and programming on coordinate measuring machines. Each has its own capabilities and target applications. Understanding these options helps manufacturers choose the right tool for their specific tasks and operational needs.
PC-DMIS: The Industry Standard
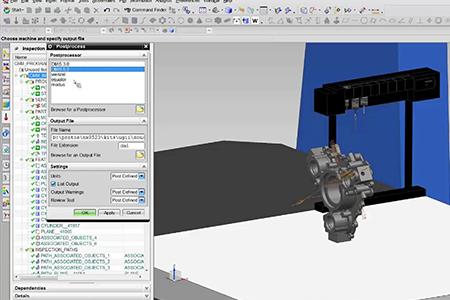
PC-DMIS is the industry standard for CMM programming, offering full measurement and analysis tools. It's a market leader due to its extensive feature set, machine compatibility and strong GD&T capabilities. It handles everything from simple dimensional checks to multi-setup inspections.
The software excels at complex geometric calculations and detailed reporting. It integrates with CAD systems, allowing users to import models and create inspection routines directly from design geometry.
Zeiss Calypso
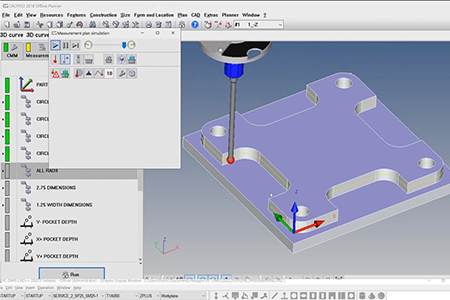
Zeiss Calypso is known for its user-friendly interface and powerful capabilities for complex inspection tasks. It supports a wide range of measuring machines and allows users to define probe paths, measurement sequences and data parameters quickly.
A major advantage of Calypso is its seamless CAD integration—design data can be imported directly so every measurement aligns with the original part specs.
Calypso's reporting tools generate detailed inspection outputs, including:
- Dimensional analysis
- 3D graphical outputs
- Statistical summaries for tolerance checks
It also includes automation features like macro programming and custom workflows to reduce setup time and minimize human error.
Autodesk PowerInspect
Autodesk PowerInspect is a flexible CMM programming tool that imports 3D models from CAD and builds detailed inspection routines. It supports both tactile and non-contact probes, automated feature recognition, real-time data visualization and custom reporting.
Ideal for multi-sensor CMMs, PowerInspect allows using different probes within a single program for complete inspection coverage. With a user-friendly interface and scripting options, it's widely used in aerospace and automotive industries.
Metrolog X4: Advanced Integration
Metrolog X4 offers advanced CAD integration and is ideal for validating complex geometries. Its intuitive programming environment reduces the learning curve for new users and supports detailed surface analysis.
The parametric programming features enable inspection routines that adapt to variations in part families—valuable in industries like automotive and aerospace where many parts share similar specs.
KEYENCE: Easy Operation
KEYENCE's proprietary software is designed for simplicity, offering one-button operation and augmented reality overlays to assist with programming. It targets users who need reliable measurements without extensive programming knowledge.
Automated measurement routines and visual guidance minimize setup time and human error. Its focus on user experience makes it popular in environments where operator efficiency impacts production throughput.
Hexagon Metrology: Multi-Sensor
Hexagon Metrology systems combine various measurement technologies—tactile probes, laser scanners, and vision systems—into a single programming platform. This unified approach ensures that all data is managed in the same coordinate system, which is essential for complex parts requiring multiple inspection methods.
Specialized Solutions
Open-source and custom programming solutions are available for specialized manufacturing needs. These options offer flexibility and cost benefits but require substantial technical expertise and infrastructure.
Companies with unique measurement challenges or those needing integration with manufacturing execution systems (MES) often develop custom solutions. However, the development and maintenance costs must be weighed against the benefits of using commercial off-the-shelf software.
CMM Programming Process and Workflow
The cmm programming process follows a structured workflow to ensure accurate measurements and reliable results. This process minimizes errors and maximizes measurement efficiency and repeatability across different parts and production runs.
Program Development Steps
Programming starts with importing CAD models and setting up coordinate systems and datums. This is the foundation for all measurements and ensures design intent matches inspection results.
Part setup is setting up workpieces and datums. Proper fixturing and datum establishment is key to repeatable measurements and accuracy throughout the inspection process.
Probe qualification is determining stylus ball diameter and establishing measurement baselines. This calibration process characterizes the measuring probe and accounts for probe tip geometry in all measurements.
Feature programming is defining planes, circles, cylinders and complex geometries for inspection. Each feature requires specific measurement strategies based on its geometry and tolerance.
Tolerance evaluation is comparing measured values to engineering specifications. The programming must include proper GD&T interpretation so measurements match design intent and functional requirements.
Report generation is creating documentation for quality records and process control. Modern reporting includes statistical analysis, trend monitoring and automated pass/fail based on specification limits.
Automated vs Manual Programming
Automated programming uses CAD models to create inspection routines with minimal operator input. This uses the geometric information in 3D models to create measurement sequences automatically, reducing programming time and errors.
Manual programming requires skilled operators to define each measurement point and sequence. More time consuming but gives maximum flexibility for complex parts or unique measurement requirements that automated systems can't handle.
Hybrid approaches combines automated generation with manual optimization for complex parts. This allows programmers to use automation for standard features and control over critical or difficult to measure elements.
Learn mode allows operators to teach programs by manually guiding probes through measurement sequences. This is useful for prototype information gathering or when CAD models are not available or incomplete.
Offline programming allows program development without tying up production CMM equipment. This is a big time saver as it allows programming to happen in parallel to production measurements.
CMM Machine Types and Programming Requirements
Different CMM machines require different programming approaches based on their mechanical configuration and application. Understanding these differences helps programmers optimize their routines for the machine's capabilities and limitations.
Bridge and Gantry CMMs
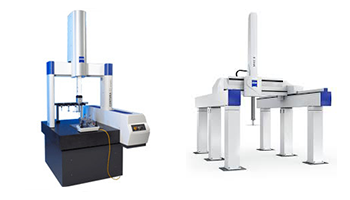
Bridge/gantry CMMs need to be programmed for large parts with complex measurement sequences. These machines can handle big workpieces and are ideal for aerospace and automotive where precision is key.
Programming for these machines involves considering probe access, collision avoidance and measurement sequencing. The large measurement volumes and high accuracy requirements demand advanced programming strategies to get the best results.
Horizontal Arm CMMs
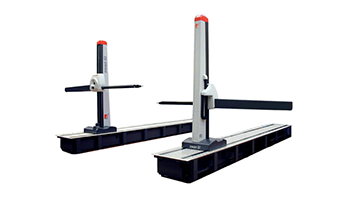
Horizontal arm CMMs need to be programmed for bore and internal feature measurement. These machines are great for measuring deep holes, internal geometries and features that are hard to measure with vertical probe configurations.
The programming must take into account probe length, deflection and access angles when measuring internal features. Careful consideration of probe tip and measurement strategy is crucial for accuracy.
Portable and Handheld Systems
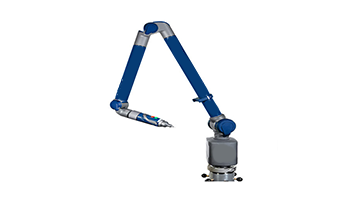
Portable arm CMMs use simple programming interfaces for shop floor operators. These systems prioritize ease of use and speed over precision, so are great for large part inspection and field measurement.
Programming for portable systems focuses on user guidance and simple workflows. The software must accommodate varying operator skill levels while maintaining measurement reliability and traceability.
Vision-Based and Multi-Sensor Systems
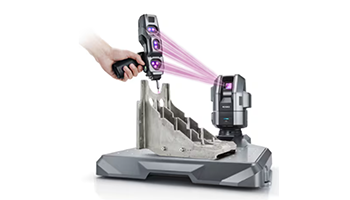
Vision-based systems integrate optical and tactile measurement through one programming platform. These machines combine non-contact measurement with touch probe technology to give full part analysis.
Multi-sensor CMMs combine touch probes, laser scanners and vision systems in one program. The programming must coordinate different measurement technologies and data fusion to give one inspection result.
Essential CMM Programming Skills
Being a cmm programmer requires a wide range of skills that combines technical knowledge, problem solving and attention to detail. These skills enable cmm programmers to create inspection routines and troubleshoot measurement problems.
Technical Skills
Blueprint reading and GD&T interpretation to translate engineering requirements into measurement routines. Programmers need to understand dimensional tolerances, geometric controls and datum schemes to create inspection strategies.
CAD software knowledge to import models and recognize features. Modern programming is all about 3D models so CAD literacy is essential for program development and optimization.
Statistical analysis knowledge for process control and capability studies. Programmers need to understand measurement uncertainty, gauge repeatability and reproducibility and statistical process control to ensure measurement system validity.
Operational Knowledge
Machine operation knowledge to optimize probe paths and minimize cycle times. Knowing the CMM hardware capabilities and limitations allows programmers to create efficient routines that maximize throughput while maintaining accuracy.
Programming software knowledge across multiple platforms to increase versatility and career opportunities. Knowledge of PC-DMIS, Metrolog X4 and other systems to work in different manufacturing environments.
Problem Solving Skills
Problem solving skills to solve measurement problems and programming errors. CMM programmers encounter complex geometries, difficult fixturing situations and measurement access limitations that require creative solutions.
Troubleshooting skills to identify and resolve issues with probe calibration, coordinate system establishment and measurement repeatability. These skills are essential to maintain measurement system performance and reliability.
Advanced CMM Programming
Modern cmm programming goes beyond basic point to point measurement routines. These advanced capabilities allow full part analysis and support complex manufacturing requirements across many industries.
Parametric Programming
Parametric programming allows for flexible routines that adapt to part family variations. This allows programmers to create inspection templates that adjust to different part sizes, configurations or feature locations within a part family.
It's particularly useful in automotive where similar parts change design or where multiple suppliers produce parts to the same spec. Parametric programs reduce programming time and ensure consistent measurement strategies across part variations.
Multi-Sensor Integration
Surface scanning combines touch probe and laser scanner data for full part analysis. This hybrid approach uses tactile measurement for critical features and optical scanning for full surface characterization.
The programming has to coordinate different measurement technologies and manage data collection parameters for each sensor. Proper integration ensures same coordinate system and allows to compare different measurement methods.
Advanced Automation
Temperature compensation programming accounts for thermal expansion in precision measurement. This is critical when measuring large parts or in environments with big temperature variation.
Multi-setup programming handles parts that require multiple orientations and fixtures. The programming has to manage coordinate transformations between setups and ensure data alignment for full part analysis.
Custom macro development automates repetitive programming tasks and calculations. These routines simplify the workflow and reduce human error by automating common tasks like probe changes, calibration sequences or special calculations.
Quality Control and Best Practices
Good cmm programming requires rigorous testing to ensure measurement reliability and integrity of results. These are the foundation of a trusted measurement system and meet regulatory requirements.
Calibration and Validation
Regular probe calibration keeps measurement uncertainty within spec. This process characterizes the probe tip and the relationship between probe readings and actual coordinates.
Program validation with known master parts ensures measurement accuracy. This verification process proves the program produces the correct results and helps you find systematic errors before they get into production measurement.
Documentation standards are program comments, revision control and operator instructions. Proper documentation ensures program traceability and helps when measurement issues arise.
Measurement System Analysis
Measurement uncertainty analysis quantifies and minimizes variation. This looks at probe repeatability, machine accuracy, environmental conditions and part fixturing to determine overall measurement capability.
Continuous improvement processes optimize cycle times while keeping measurement quality. Regular review of programming strategies, measurement sequences and reporting requirements helps find opportunities for efficiency gains.
Statistical process control monitors the measurement system over time. This ongoing surveillance helps detect drift, find calibration needs and ensures measurement reliability.
Future of CMM Programming
CMM programming technology is evolving fast with AI, connectivity and automation. These will change how CMMs work and fit into modern manufacturing systems.
Artificial Intelligence
Artificial intelligence will automate program generation and optimise measurement strategies. Machine learning algorithms will analyse part geometry, tolerance requirements and measurement history to create optimal inspection routines.
These will learn from measurement results and operator feedback to improve programming recommendations. AI optimisation will reduce programming time and improve measurement accuracy and efficiency.
Industry 4.0
Cloud based programming platforms allow remote programming and real time collaboration. Programmers can develop and modify inspection routines from anywhere with version control and security.
Industry 4.0 connects CMM data to manufacturing execution systems. This allows real time quality feedback to production and predictive maintenance for parts and measuring equipment.
Better User Interfaces
Augmented reality interfaces simplify programming and provide visual measurement guidance. These overlay digital information onto physical parts, so operators understand measurement requirements and reduce training time for new users.
Machine learning will predict measurement requirements and optimise probe paths. These will analyse historical data to suggest optimal measurement strategies and identify potential quality issues before they happen.
FAQs about CMM Programming
What programming languages do CMMs use?
Most CMMs use proprietary software languages, PC-DMIS being the most common, some support custom scripting for automation or MES integration.
What is the difference between CMM programming and operation?
Programming is creating measurement routines and strategies, operation is running programs, doing basic setup and interpreting results. For example a CMM programmer would write a program to inspect a machined part for dimensional accuracy by defining probe paths, measurement points and tolerance checks, while an operator would load the part and run the program.
How accurate are programmed CMM measurements?
A properly programmed CMM can achieve ±0.0001" (±2.5 microns) accuracy depending on machine and environmental conditions. High end systems can achieve even better accuracy in controlled conditions.
What industries use CMM programming the most?
Aerospace, automotive, medical devices and precision manufacturing use CMM programming the most. These industries require tight quality control and dimensional verification for safety critical parts.
Is offline CMM programming worth it?
Offline programming reduces machine downtime and allows for program optimization without production interruption. For most manufacturing operations this is a big ROI for machine utilization.

